Most people have never used a masonry saw. Unless you work in construction or masonry, you may not have either, but sometimes you may need to. The one thing you will notice about a masonry saw is that it is quite different from other types of saws. But once you have a few basic concepts clear, the function of a masonry saw should not be complicated. In this post, we share with you the four steps on how to use a masonry saw.
Safety Considerations
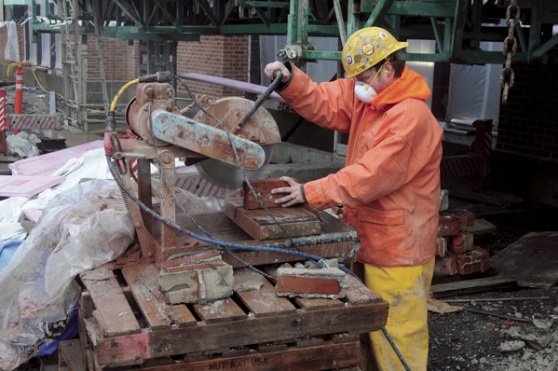
Safety is one of the top most considerations to keep in mind when using a masonry saw or any other type of power tool. So, before you start using the masonry saw, it is important to ensure that you are wearing the appropriate protective gear like eye protection, respiratory mask (if you will be dry cutting) and suitable clothing. At the same time, it is important to inspect the condition of the saw before using it. Check that the electrical cords and diamond blades are working correctly before you begin.
Step 1: Choosing the Right Diamond Blade for your Masonry Saw
You want to choose a blade that is specifically suited to the material you are going to cut. The general purpose blades often work well for most materials, but harder materials like porcelain and ceramic may require specialized blades.
The proper blade will allow you to have a cleaner cut, safer operation and a longer blade life. It is also important to ensure that the blade you choose is the right size for the masonry saw and that you mount it according to the instructions in the operation manual.
Step 2: Measuring and Marking the Materials
Once you have the appropriate diamond blade for your material and it is properly mounted, the next step is to measure and mark the material for cutting. How you measure and mark the material is up to you. You then arrange the material on the masonry saw bench to align the desired cut with the blade.
Step 3: Turn on Your Masonry Saw
With everything in place, you are now ready to begin cutting the material using your masonry saw. To power it on, fill the water tank or attach the machine to a water supply. Turn on the water pump if necessary and power on the saw according to the instructions in the user manual. You should be concerned if you hear excessive vibrations or odd noises. If this happens, power off the saw and troubleshoot. It is also important to make sure that water is flowing over the blade before you begin cutting.
Step 4: Using the Masonry Saw
Now that the material you want to cut is lined up, water is flowing consistently to the saw and the saw is powered on, you are ready to begin cutting the material. To do that, slowly push the cutting head into the material using the attached handle. Be very patient and don’t push hard. Of the cut is not going as per your marking and measurement, stop the machine and re-align the material. Also, don’t try to steer the blade from the side. If you are making dry cuts, it is important to make short, shallow cuts and allow the blade to cool in the process.
Check out a wide range of saws and rotary hoes over at Able Sales.